
Connect payment gateways

Payment config holds your eSewa, Khalti, Stripe, Razorpay and Apple keys, and the manual payment methods students see.

Where: Account → Payment Config

Steps

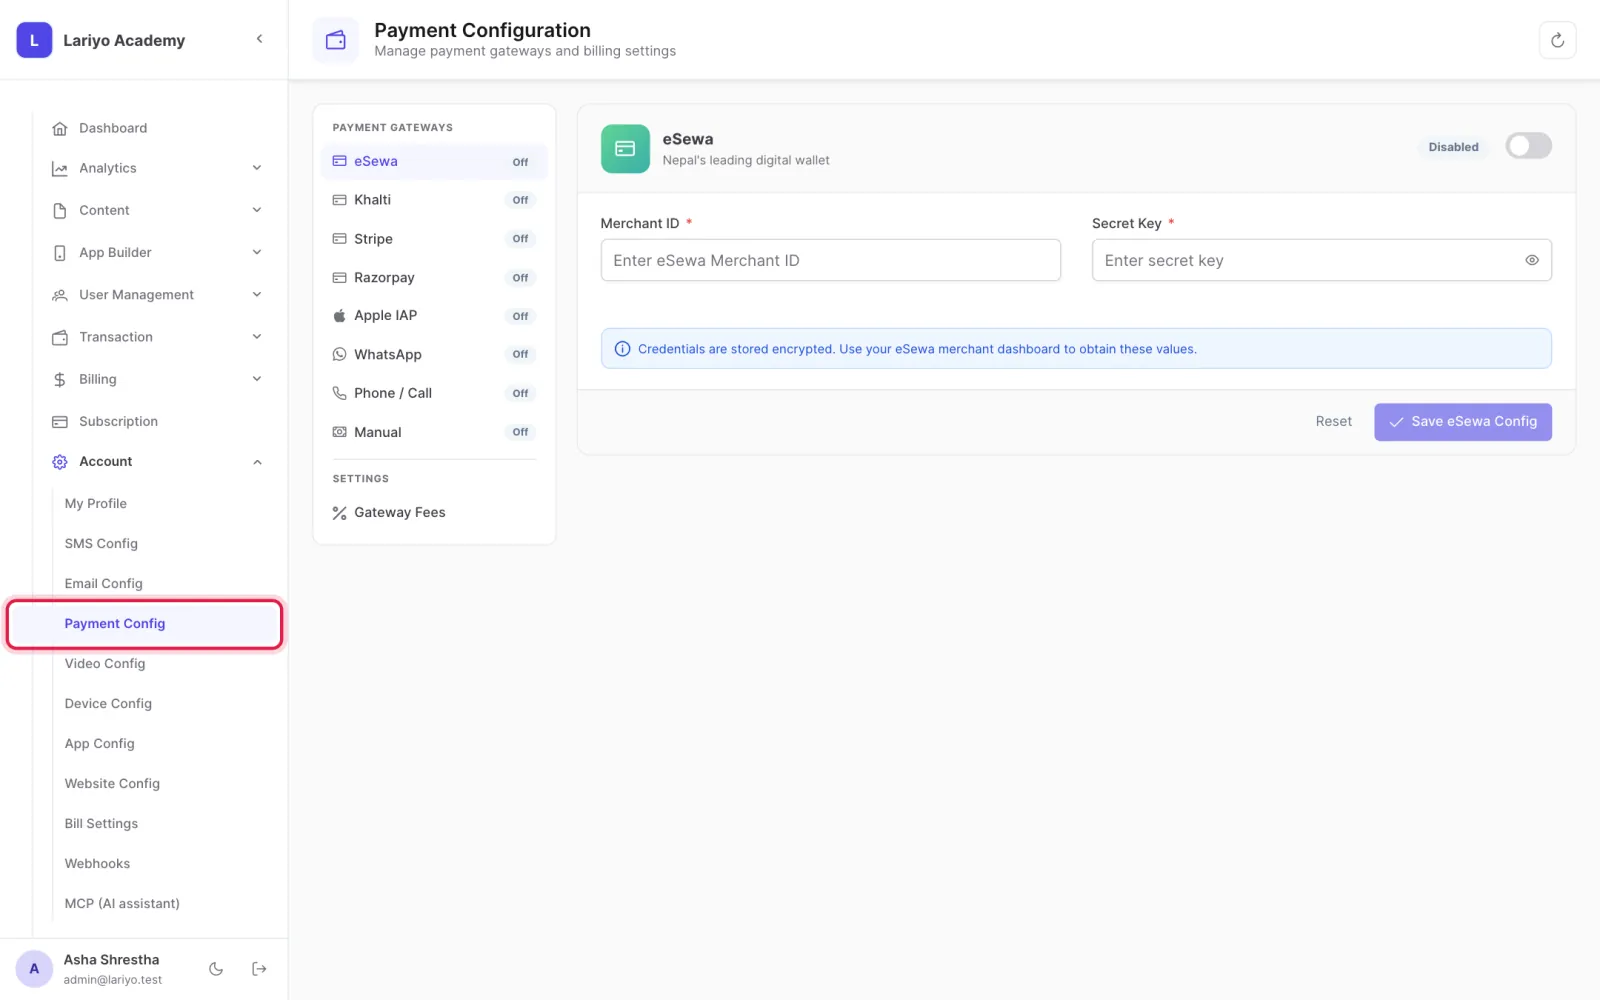
  1. Open Account → Payment Config.
    Step 1 of 5 in the Lariyo admin panel (Account → Payment Config): Open Account → Payment Config. The control to use is outlined in red.
  2. Enter your eSewa merchant ID and secret key and save.
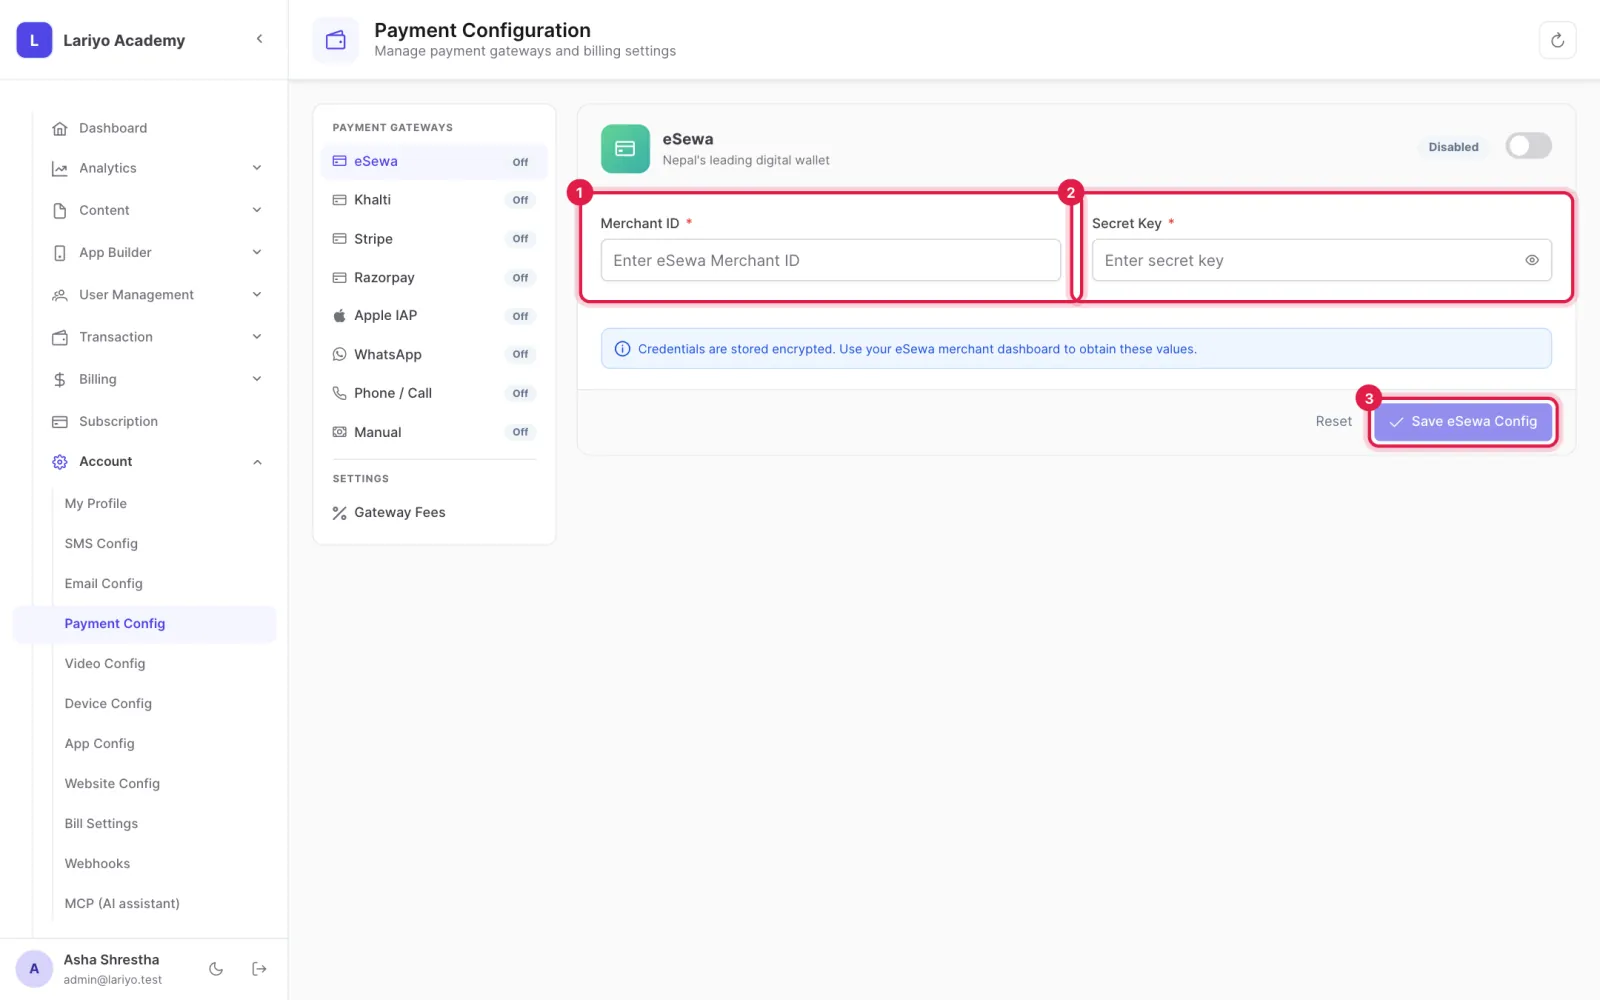
    Step 2 of 5 in the Lariyo admin panel (Account → Payment Config): Enter your eSewa merchant ID and secret key and save. The control to use is outlined in red.
  3. For iPhone sales, add the Apple bundle ID, issuer ID, key and environment.
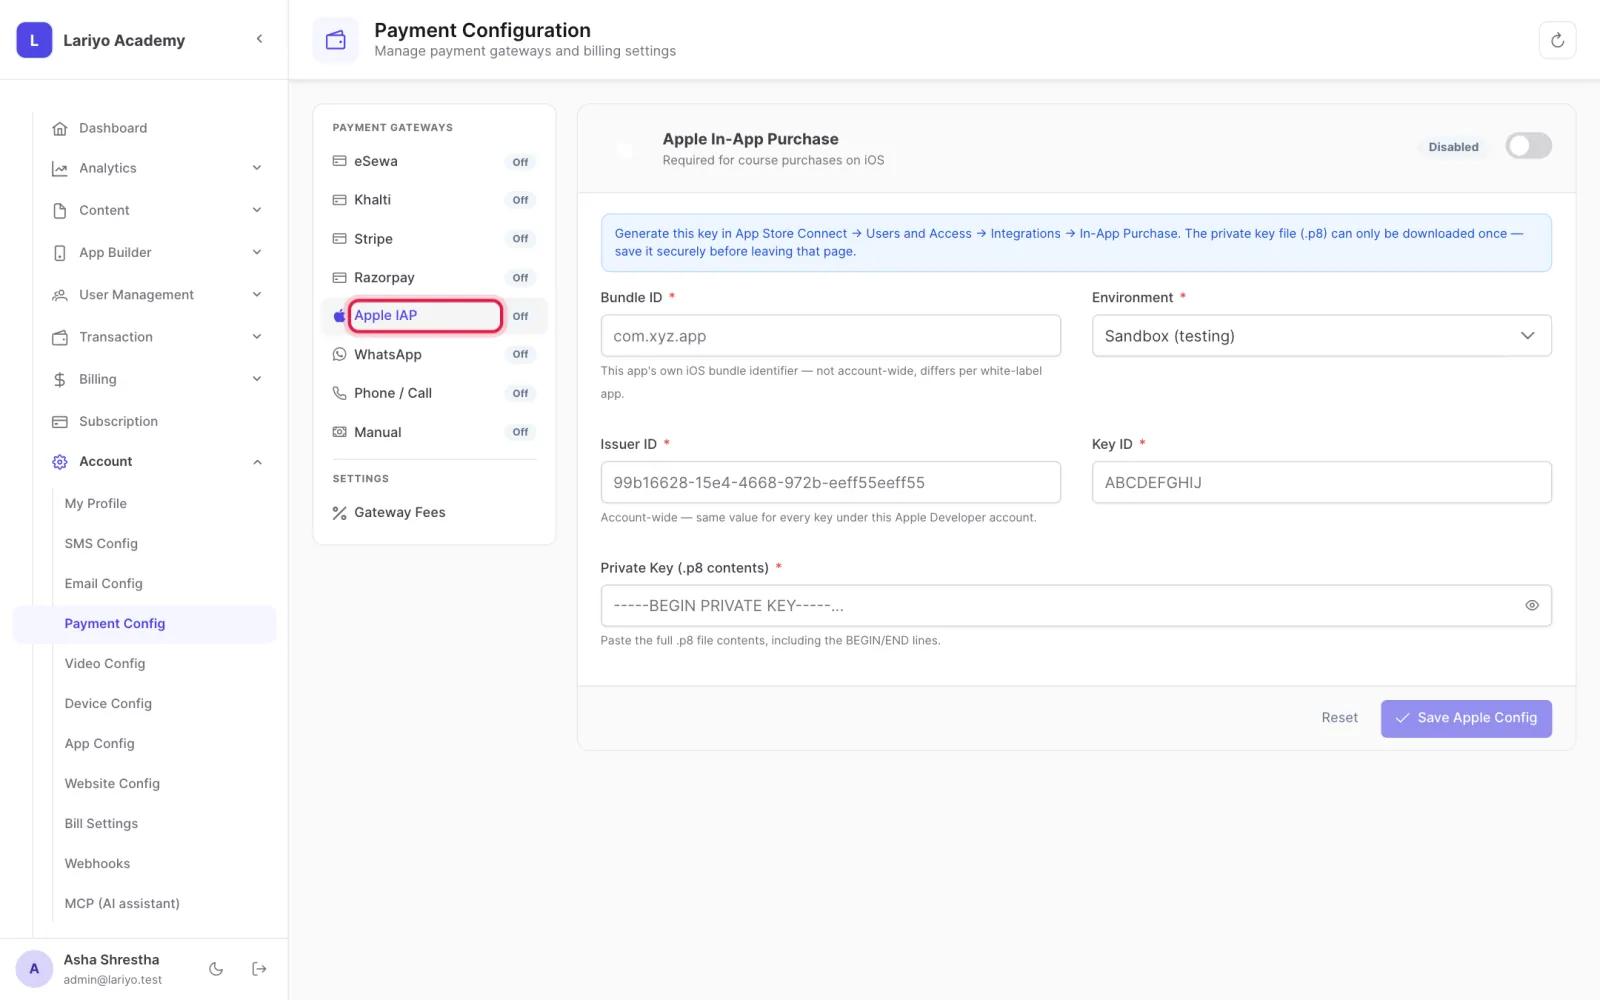
    Step 3 of 5 in the Lariyo admin panel (Account → Payment Config): For iPhone sales, add the Apple bundle ID, issuer ID, key and environment. The control to use is outlined in red.
  4. Add manual channels (bank, eSewa, Khalti, QR image) with instructions for students.
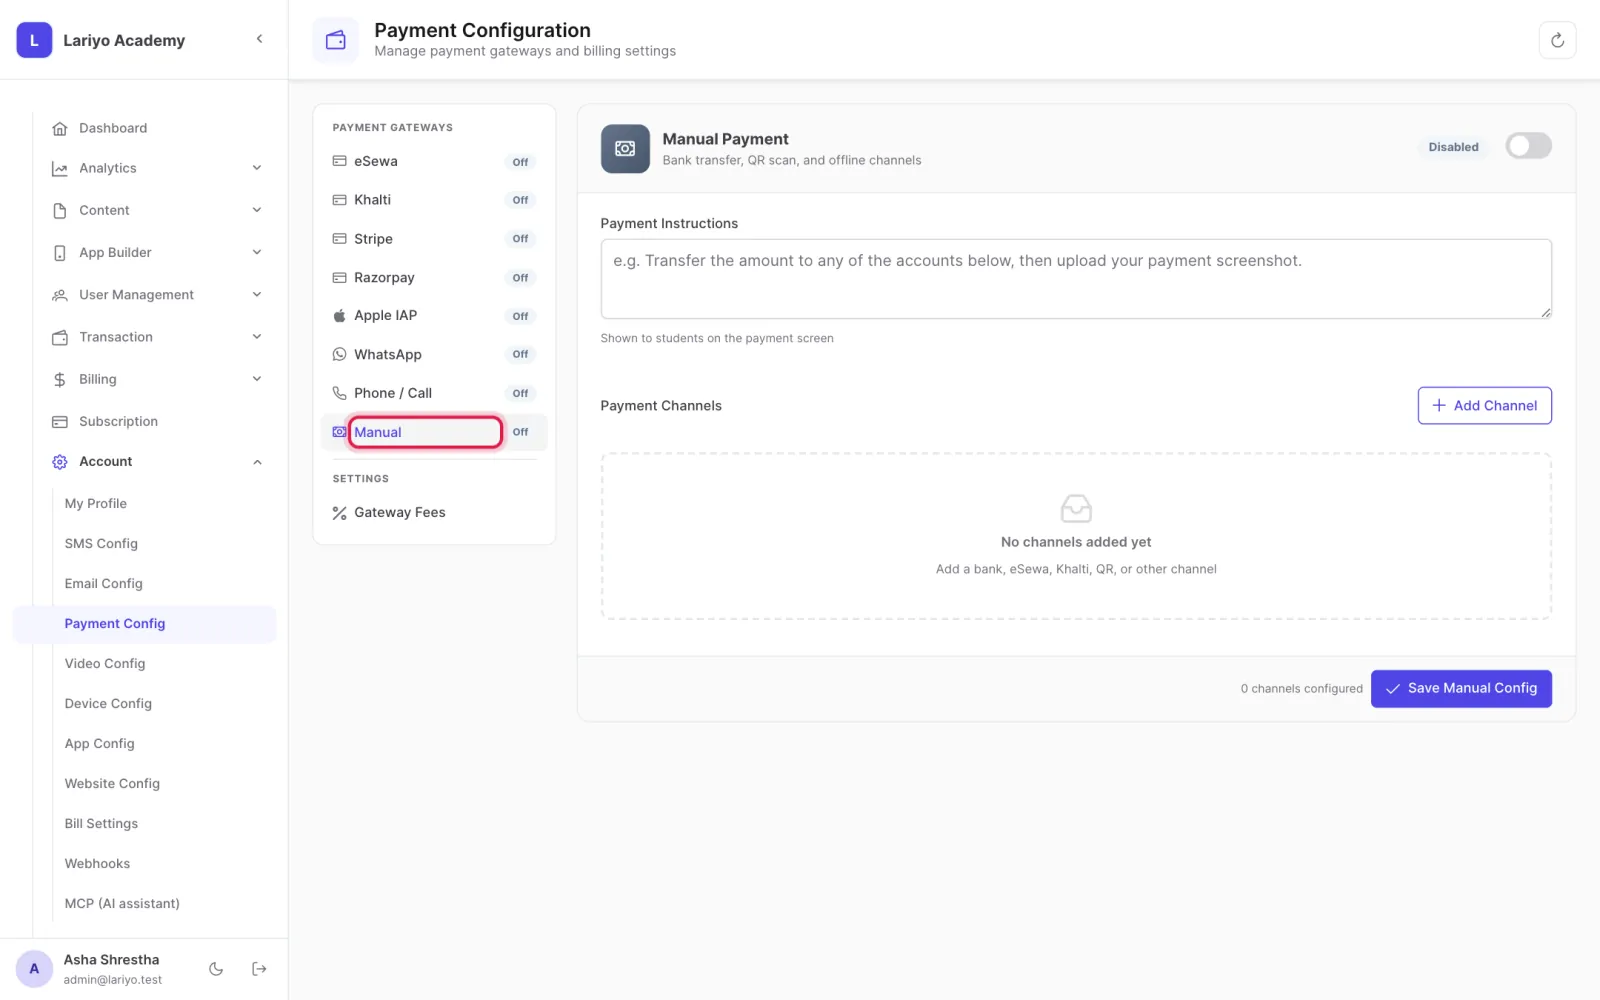
    Step 4 of 5 in the Lariyo admin panel (Account → Payment Config): Add manual channels (bank, eSewa, Khalti, QR image) with instructions for students. The control to use is outlined in red.
  5. Set each course plan's payment gateways on the course page.
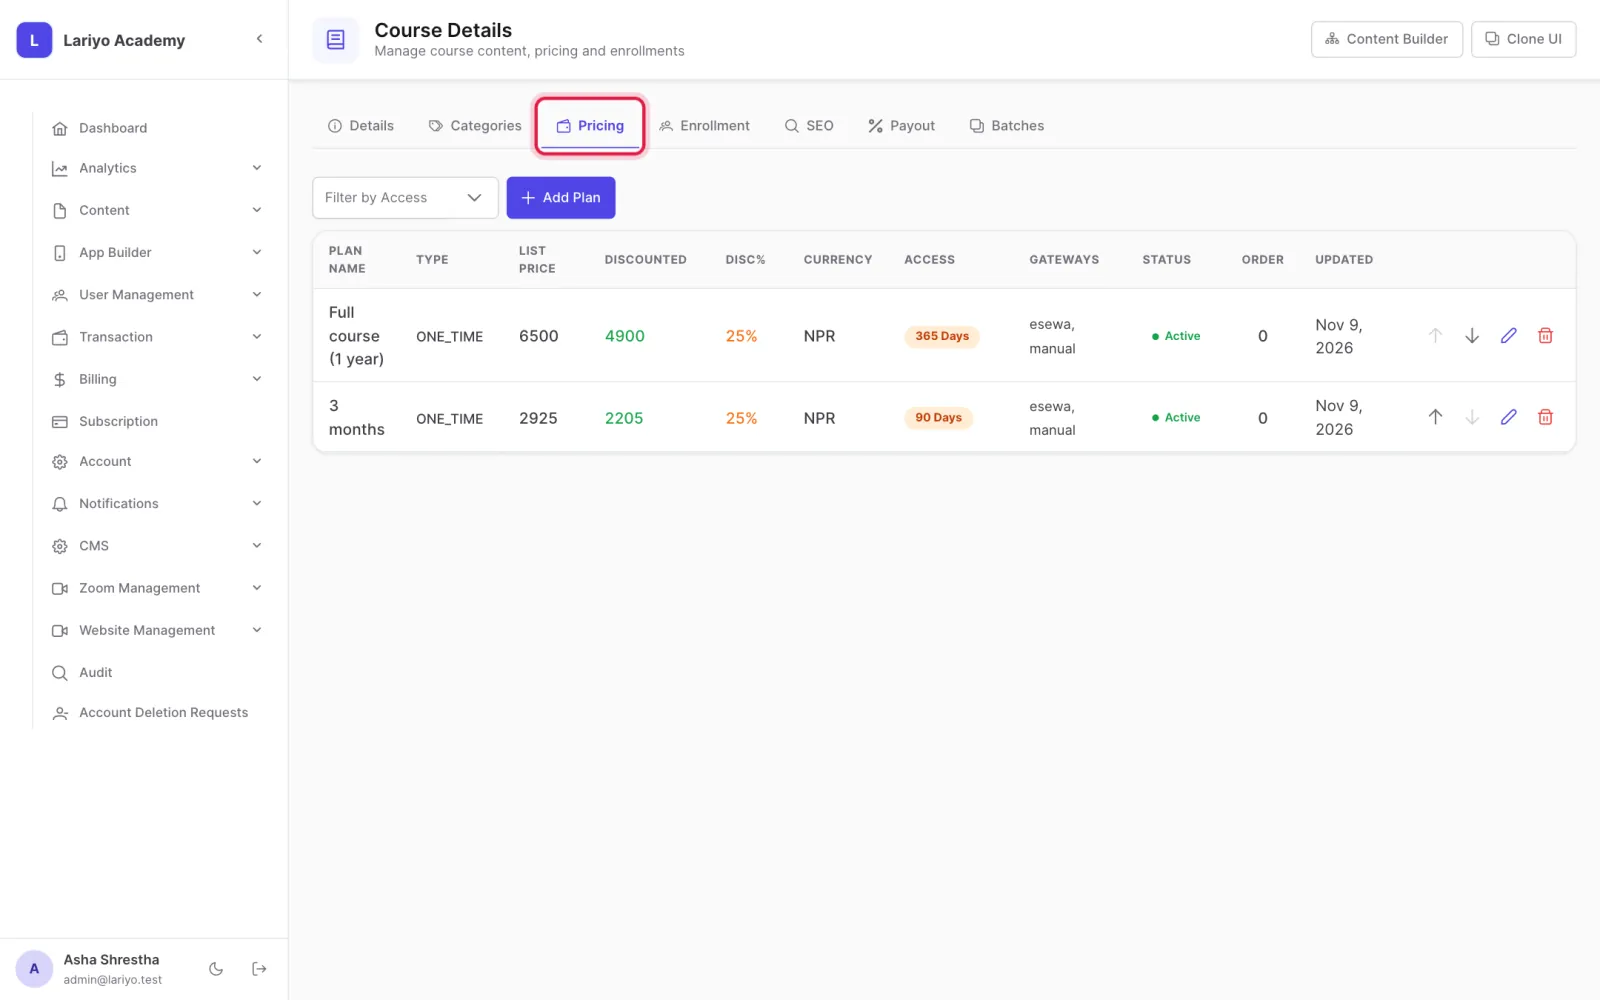
    Step 5 of 5 in the Lariyo admin panel (Account → Payment Config): Set each course plan's payment gateways on the course page. The control to use is outlined in red.

Updated 11 November 2026. Still stuck? Contact us.