
Organise courses with categories

Categories group your courses and packages in up to three levels, and the app's browse screens are built from them.

Where: Content → Categories

Steps

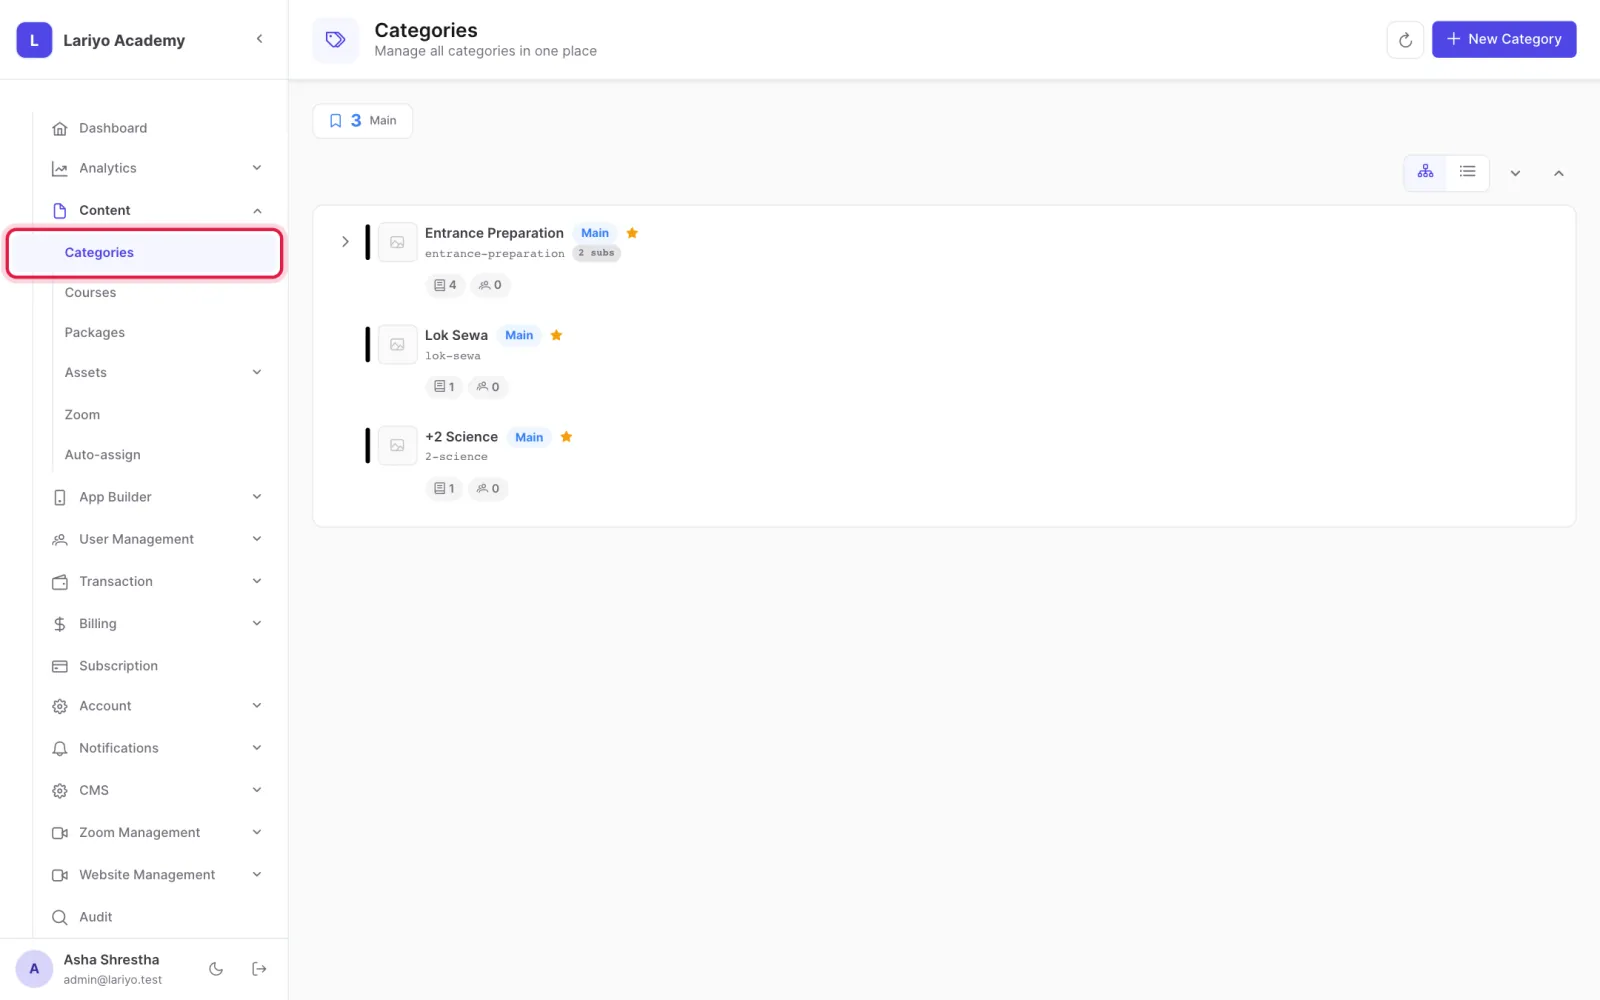
  1. Open Content → Categories.
    Step 1 of 6 in the Lariyo admin panel (Content → Categories): Open Content → Categories. The control to use is outlined in red.
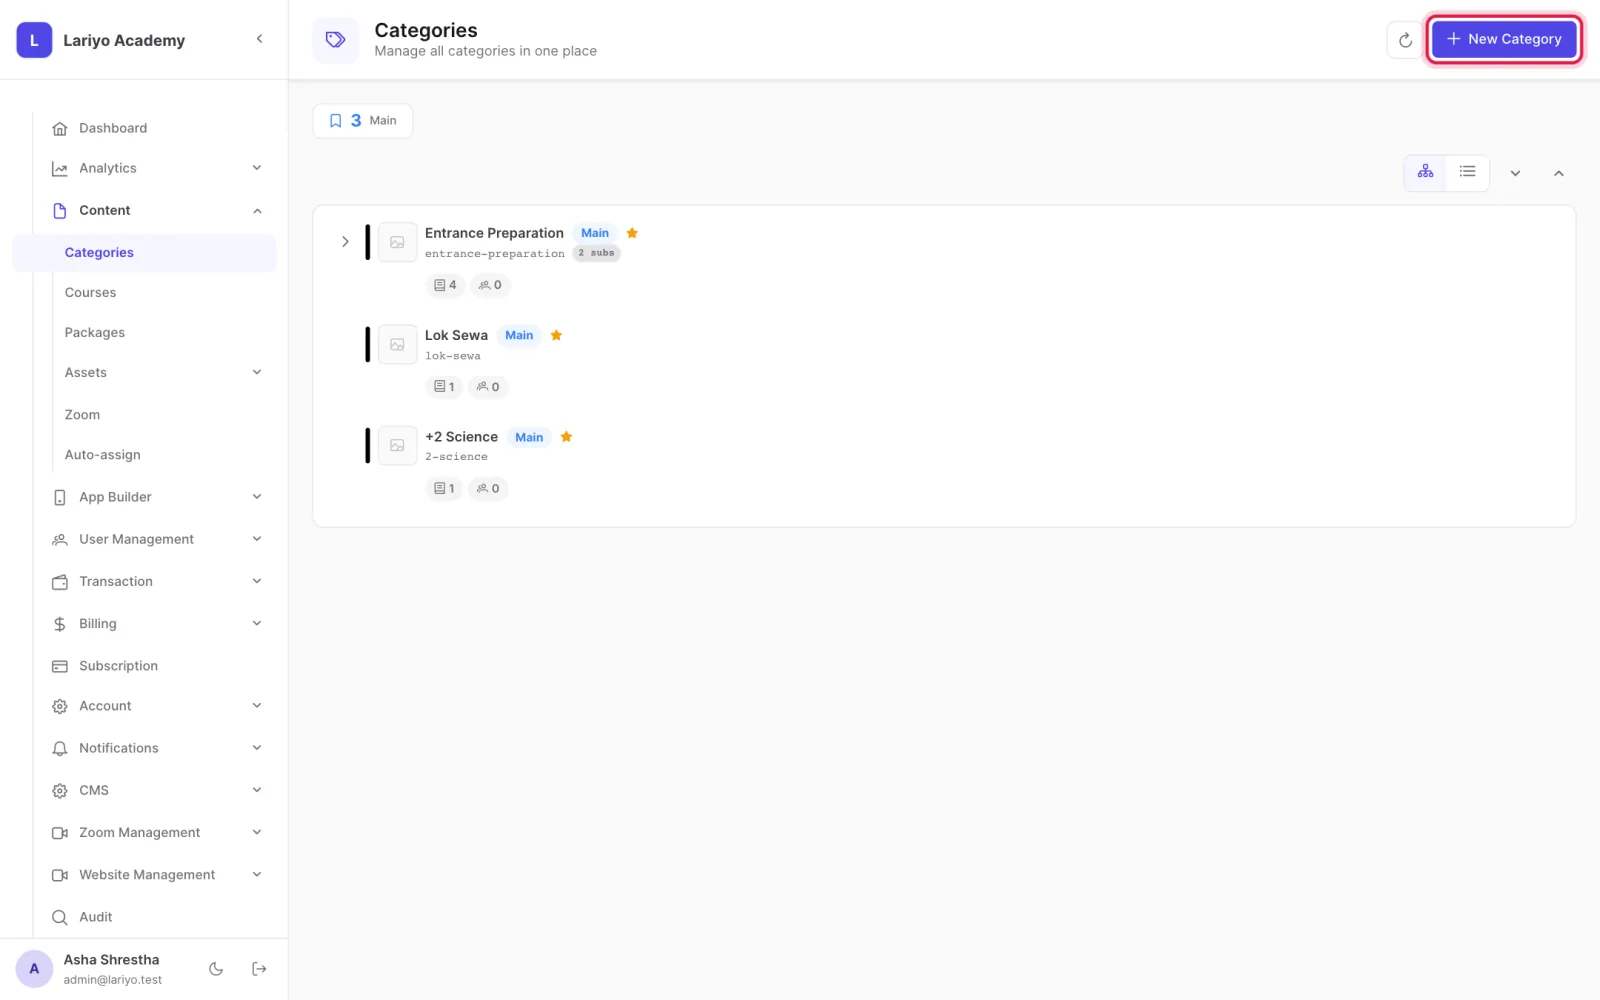
  2. Click New Category.
    Step 2 of 6 in the Lariyo admin panel (Content → Categories): Click New Category. The control to use is outlined in red.
  3. Enter a name; the slug fills in by itself.
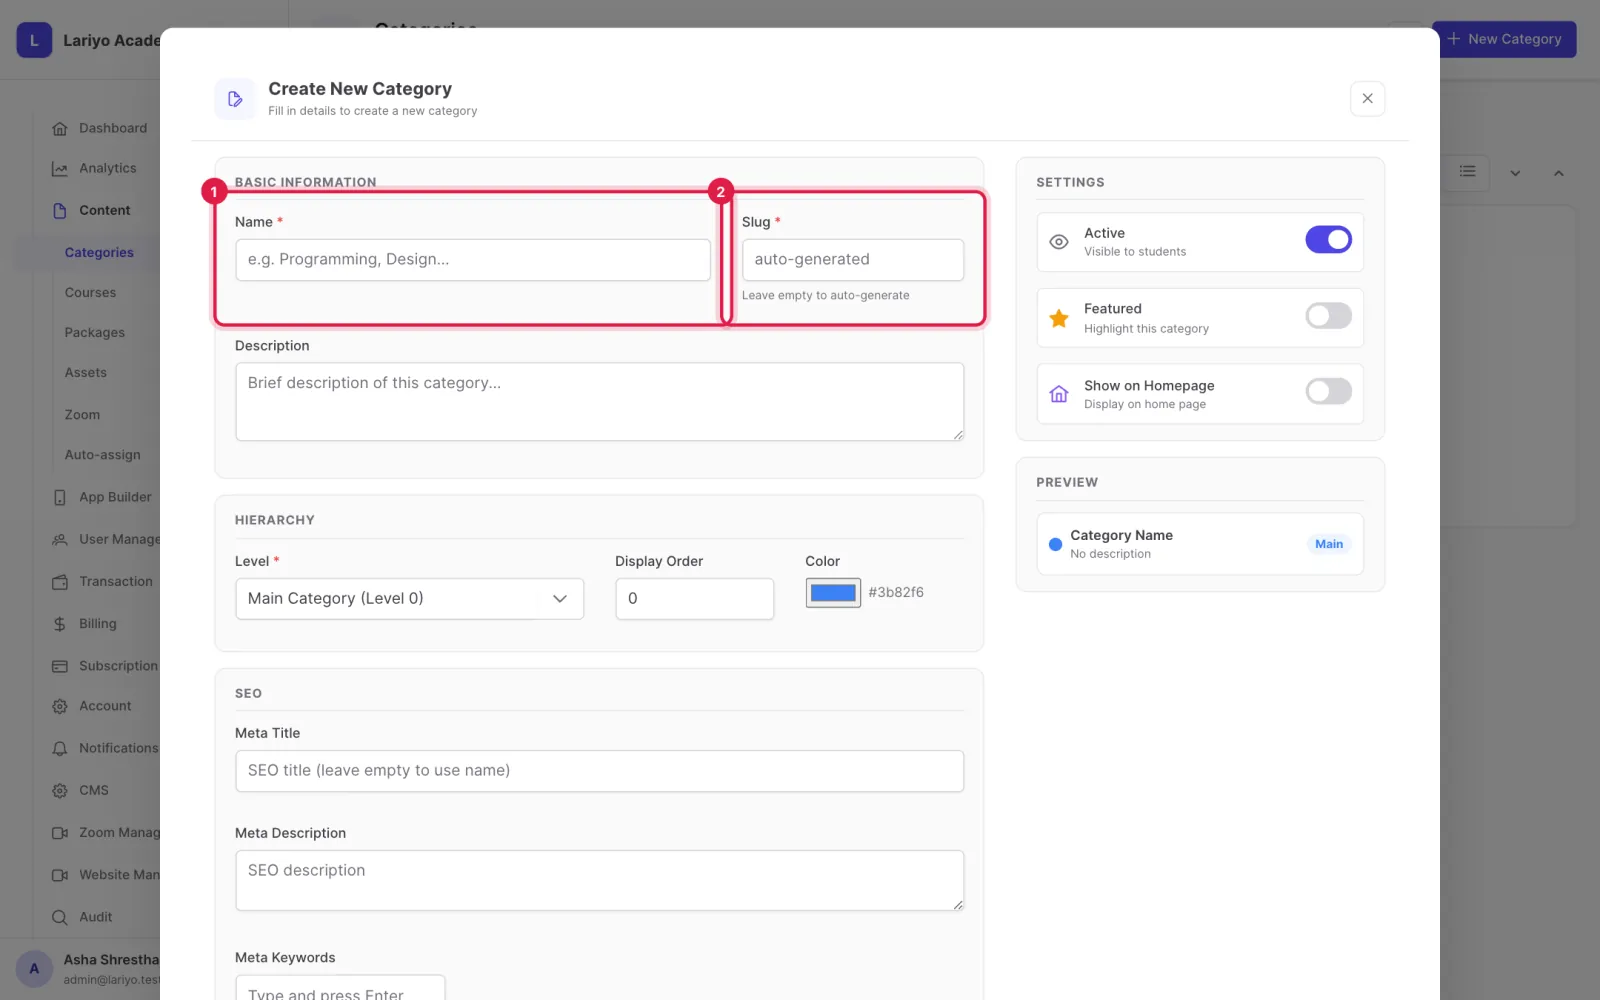
    Step 3 of 6 in the Lariyo admin panel (Content → Categories): Enter a name; the slug fills in by itself. The control to use is outlined in red.
  4. Choose the level: Main, Sub or Sub 2. For a sub category, pick its parent.
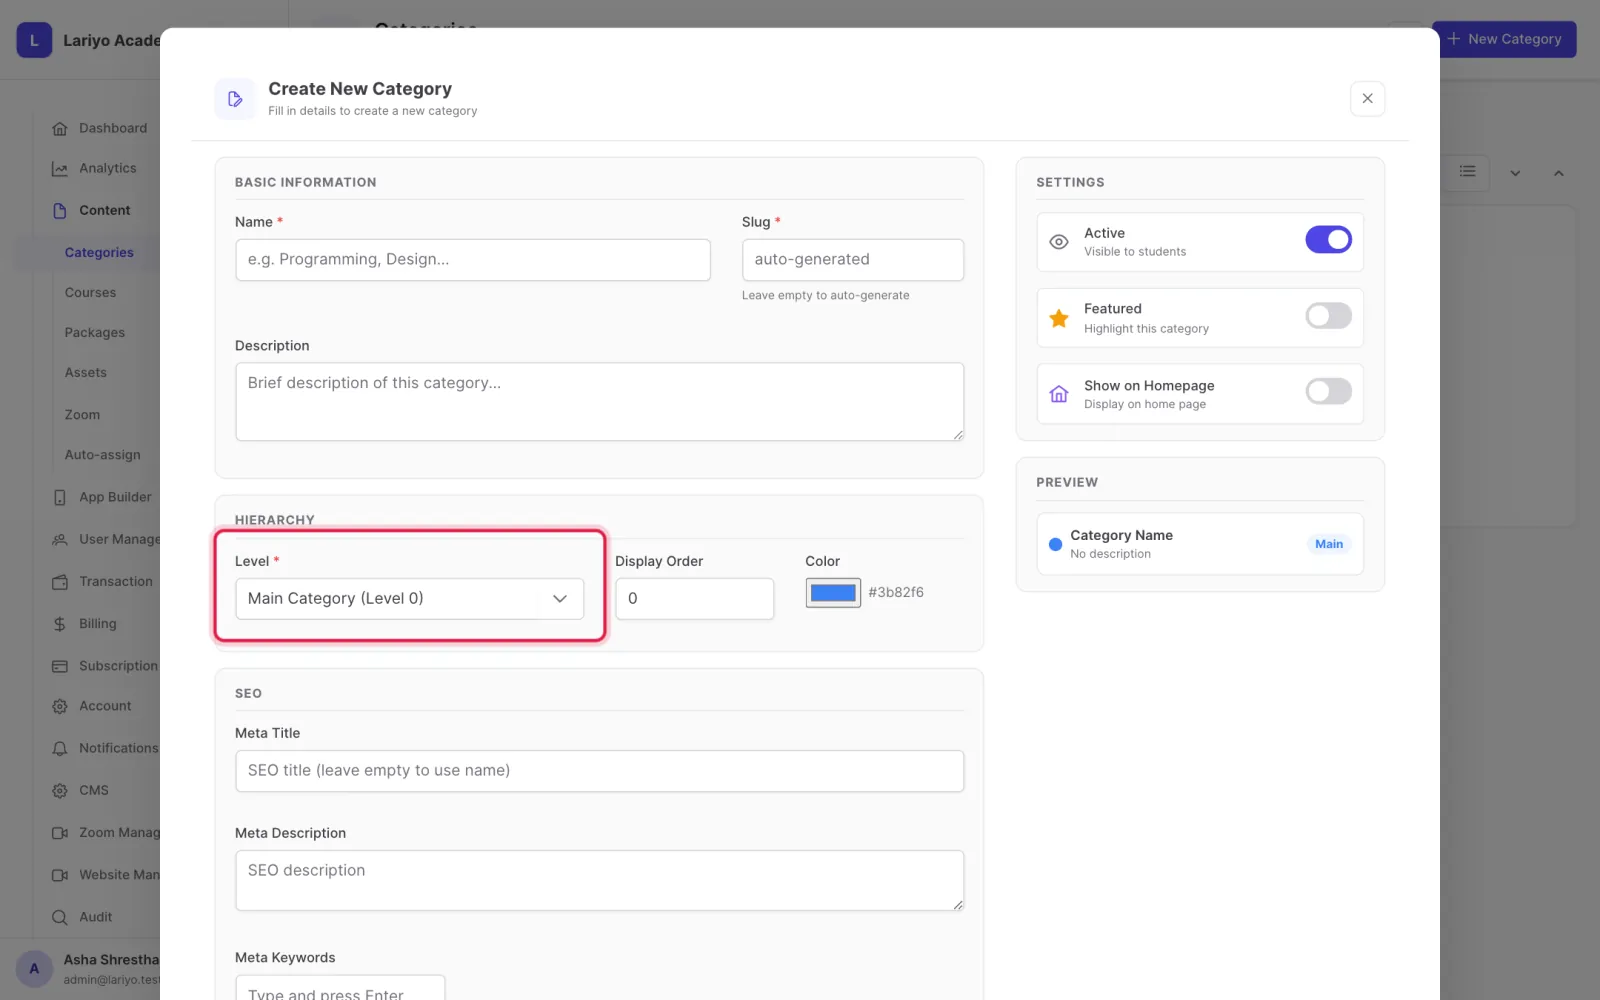
    Step 4 of 6 in the Lariyo admin panel (Content → Categories): Choose the level: Main, Sub or Sub 2. For a sub category, pick its parent. The control to use is outlined in red.
  5. Optionally add a description, colour, display order and SEO fields.
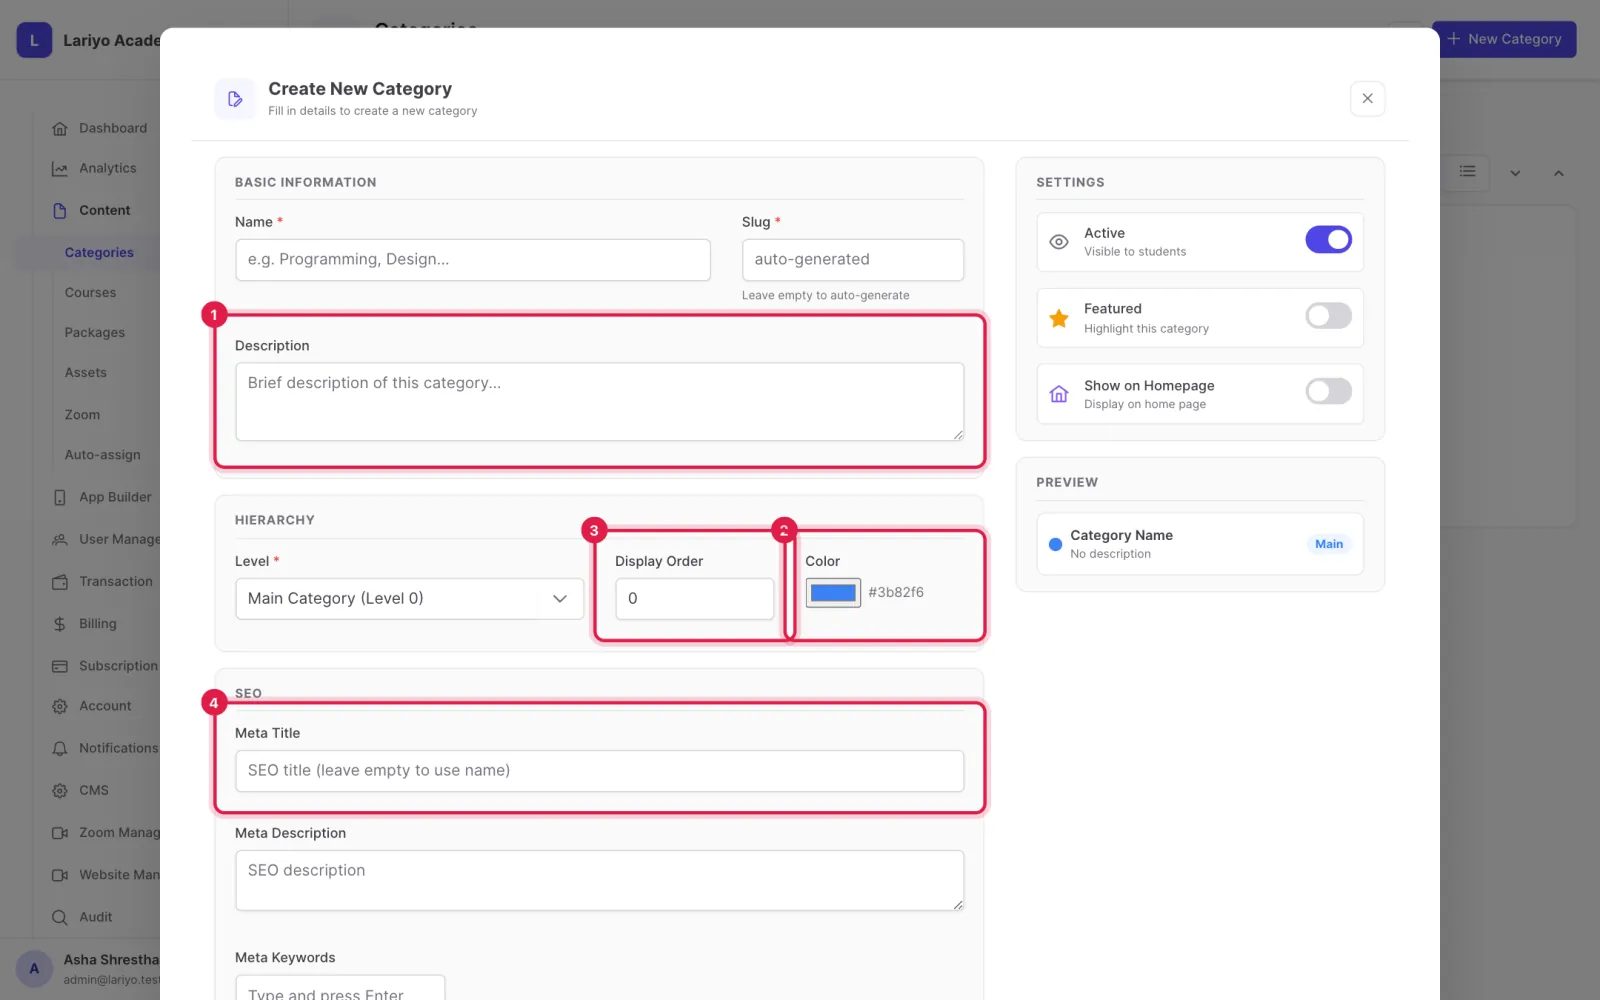
    Step 5 of 6 in the Lariyo admin panel (Content → Categories): Optionally add a description, colour, display order and SEO fields. The control to use is outlined in red.
  6. Click Create Category. Add an image, thumbnail or banner from the category's row afterwards.
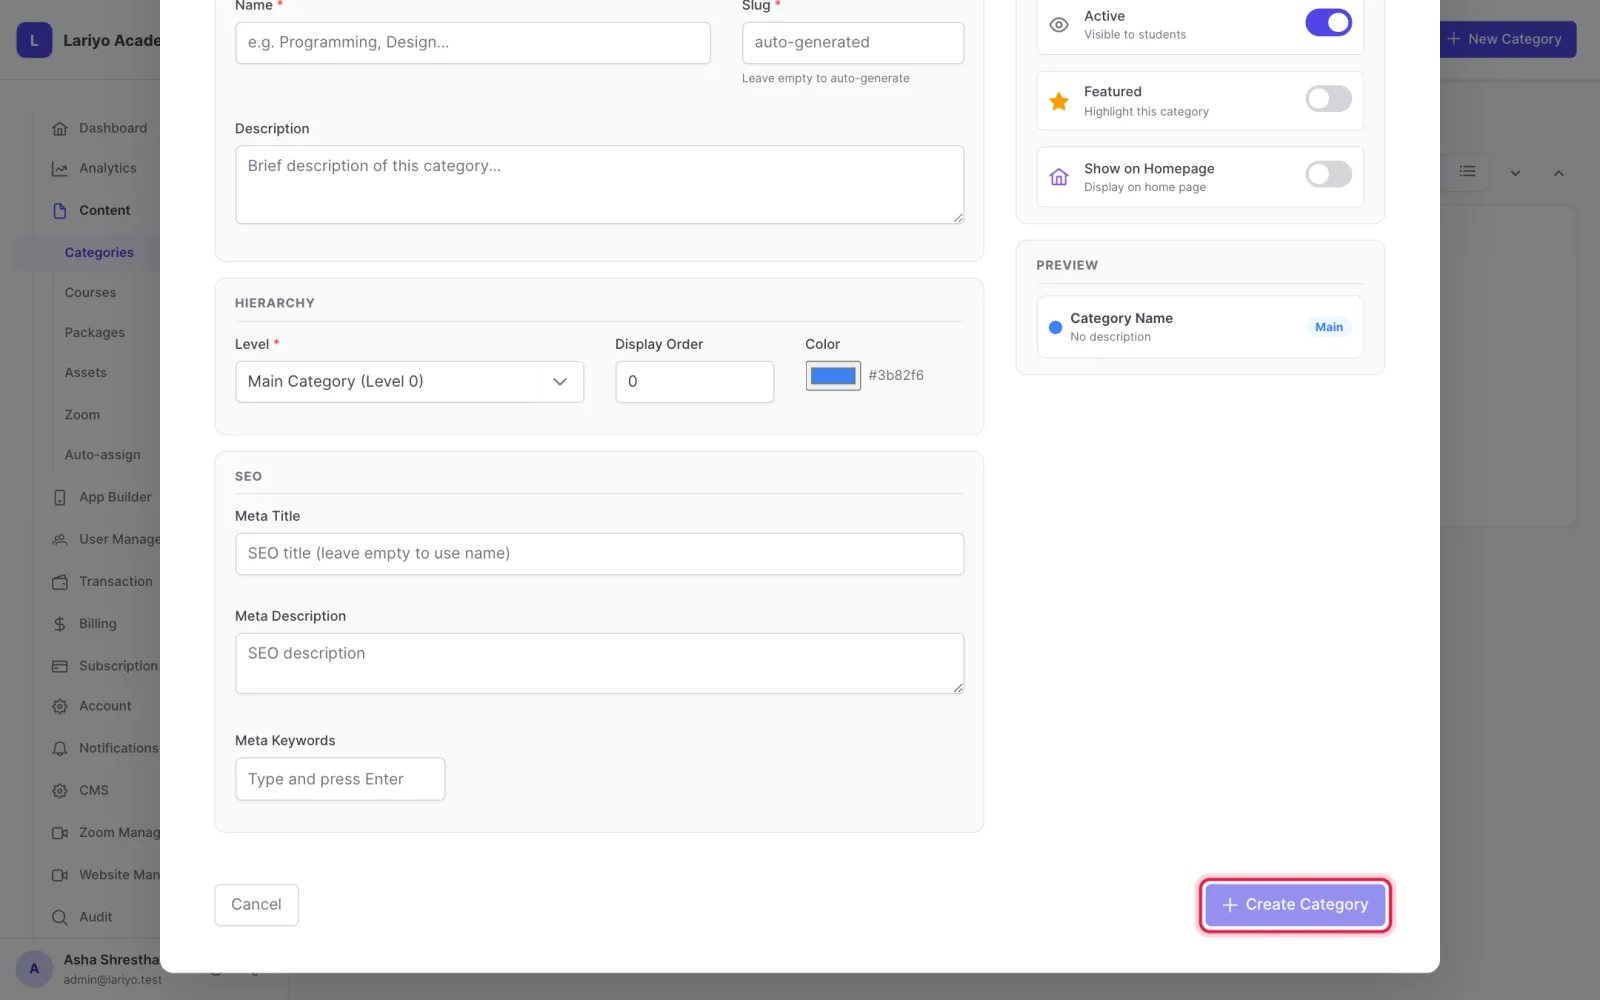
    Step 6 of 6 in the Lariyo admin panel (Content → Categories): Click Create Category. Add an image, thumbnail or banner from the category's row afterwards. The control to use is outlined in red.

Tips

Use levels such as Grade → Subject → Unit, or Exam → Stream → Paper.

Updated 11 November 2026. Still stuck? Contact us.