
Edit your website's menus, pages and blog

Website config holds the navigation, pages and blog posts of your institute's website.

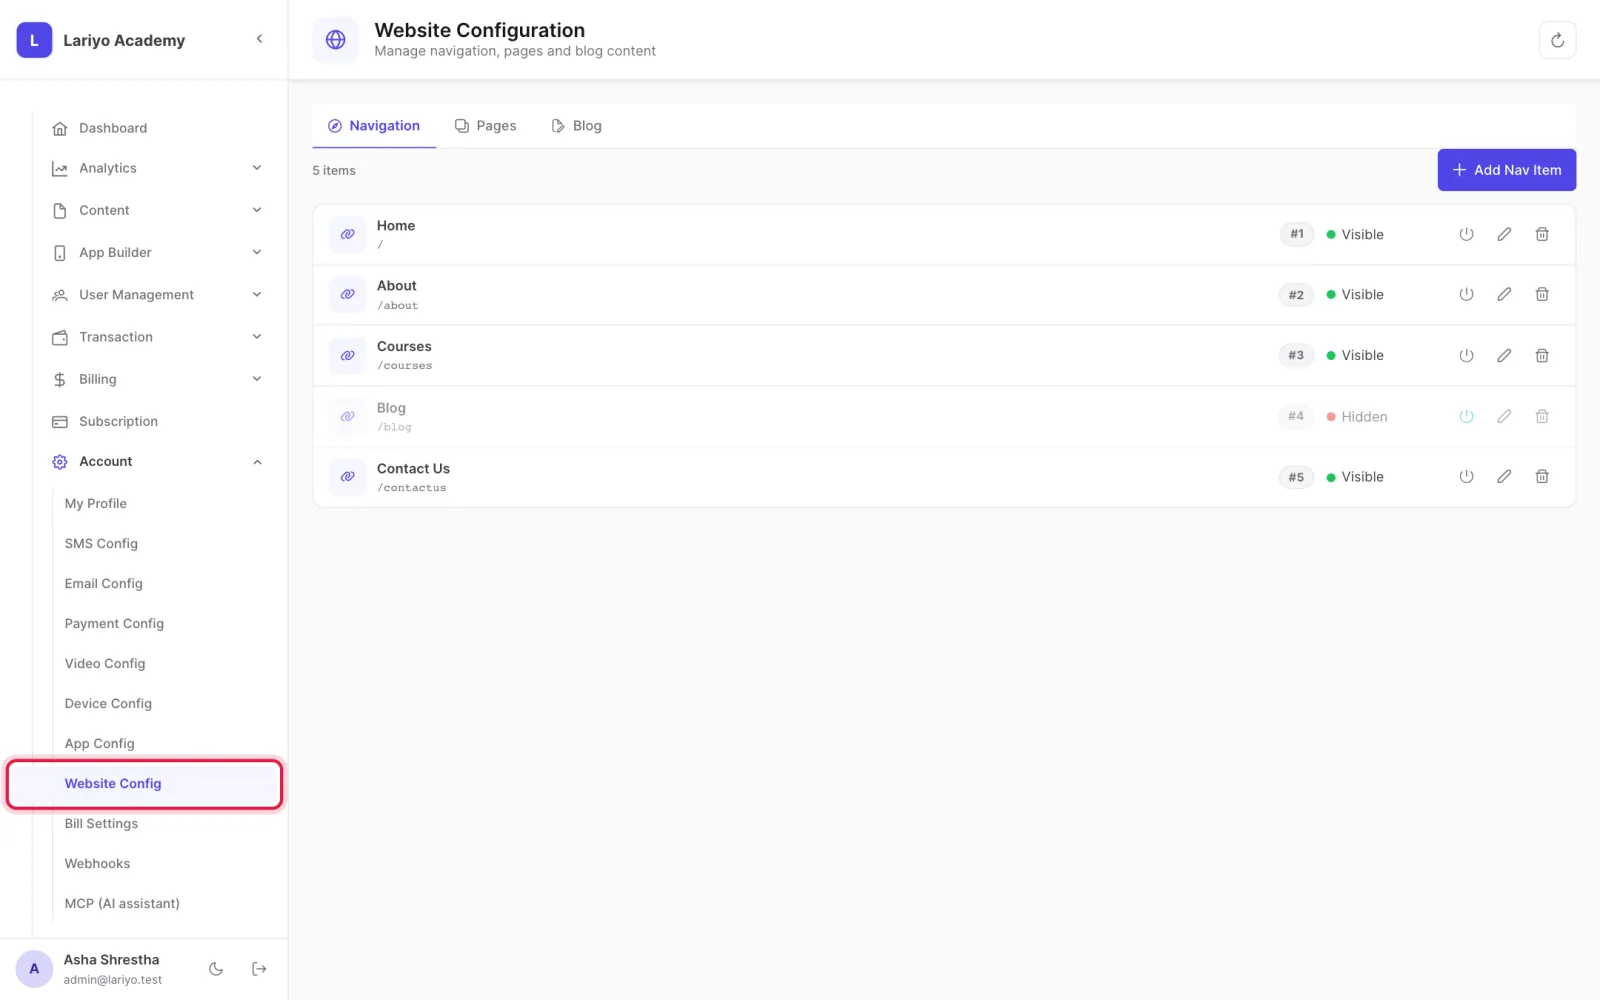
Where: Account → Website Config

Steps

  1. Open Account → Website Config.
    Step 1 of 4 in the Lariyo admin panel (Account → Website Config): Open Account → Website Config. The control to use is outlined in red.
  2. Under Navigation, add and order menu items.
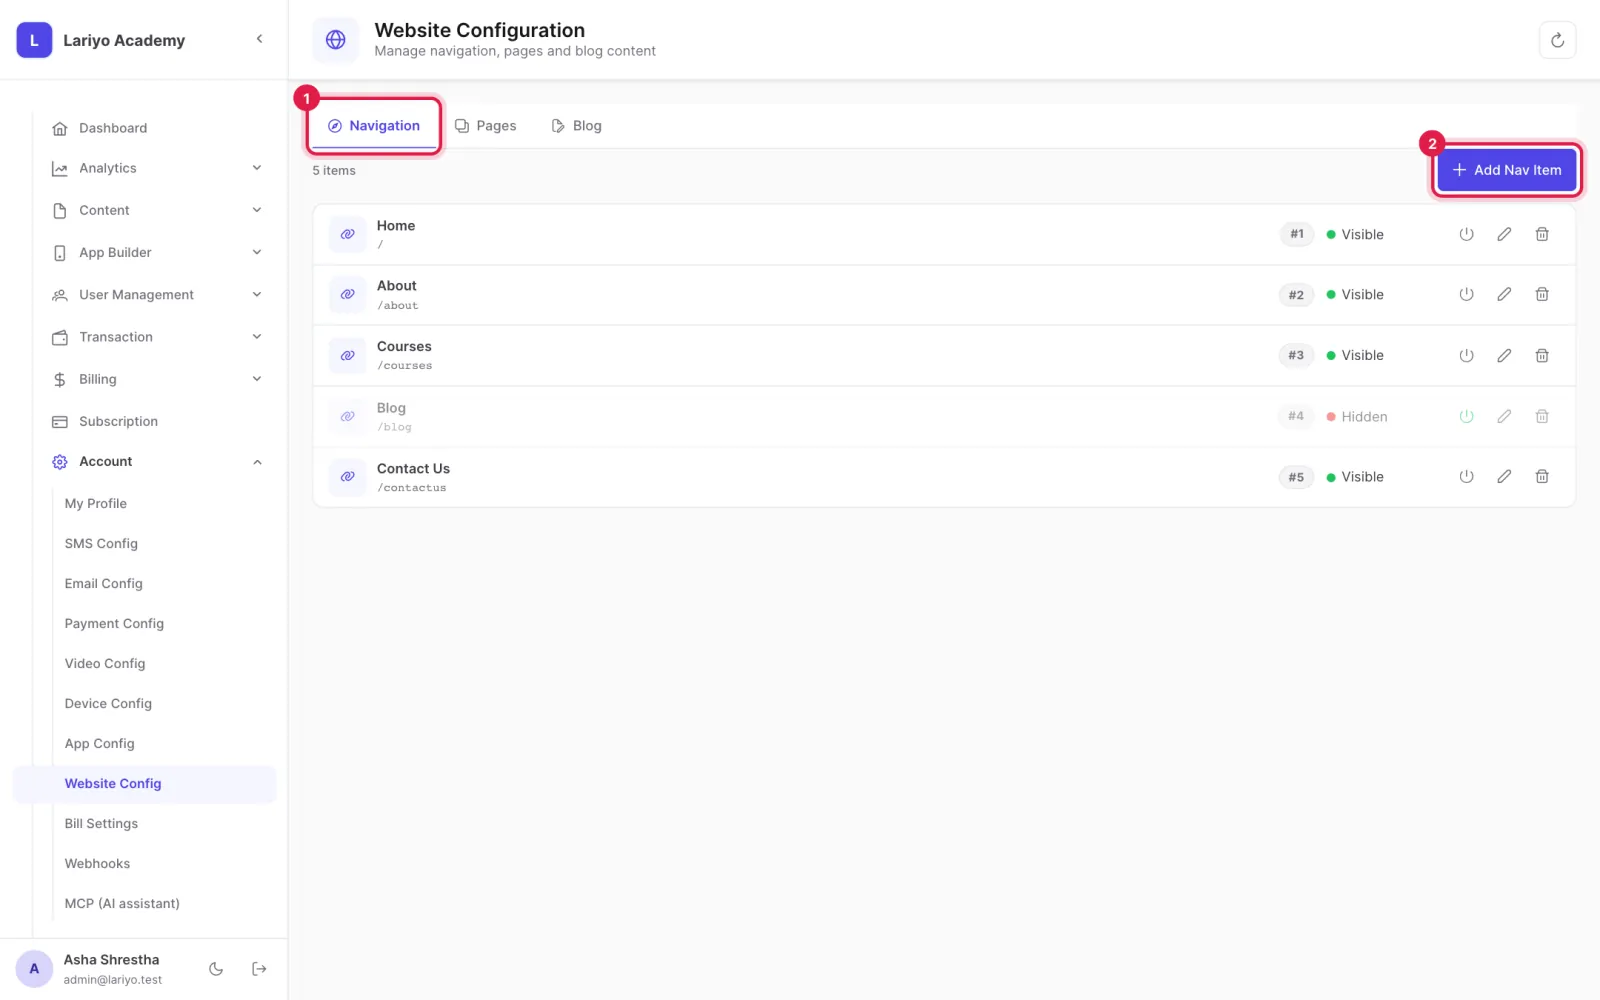
    Step 2 of 4 in the Lariyo admin panel (Account → Website Config): Under Navigation, add and order menu items. The control to use is outlined in red.
  3. Under Pages, add pages and their sections.
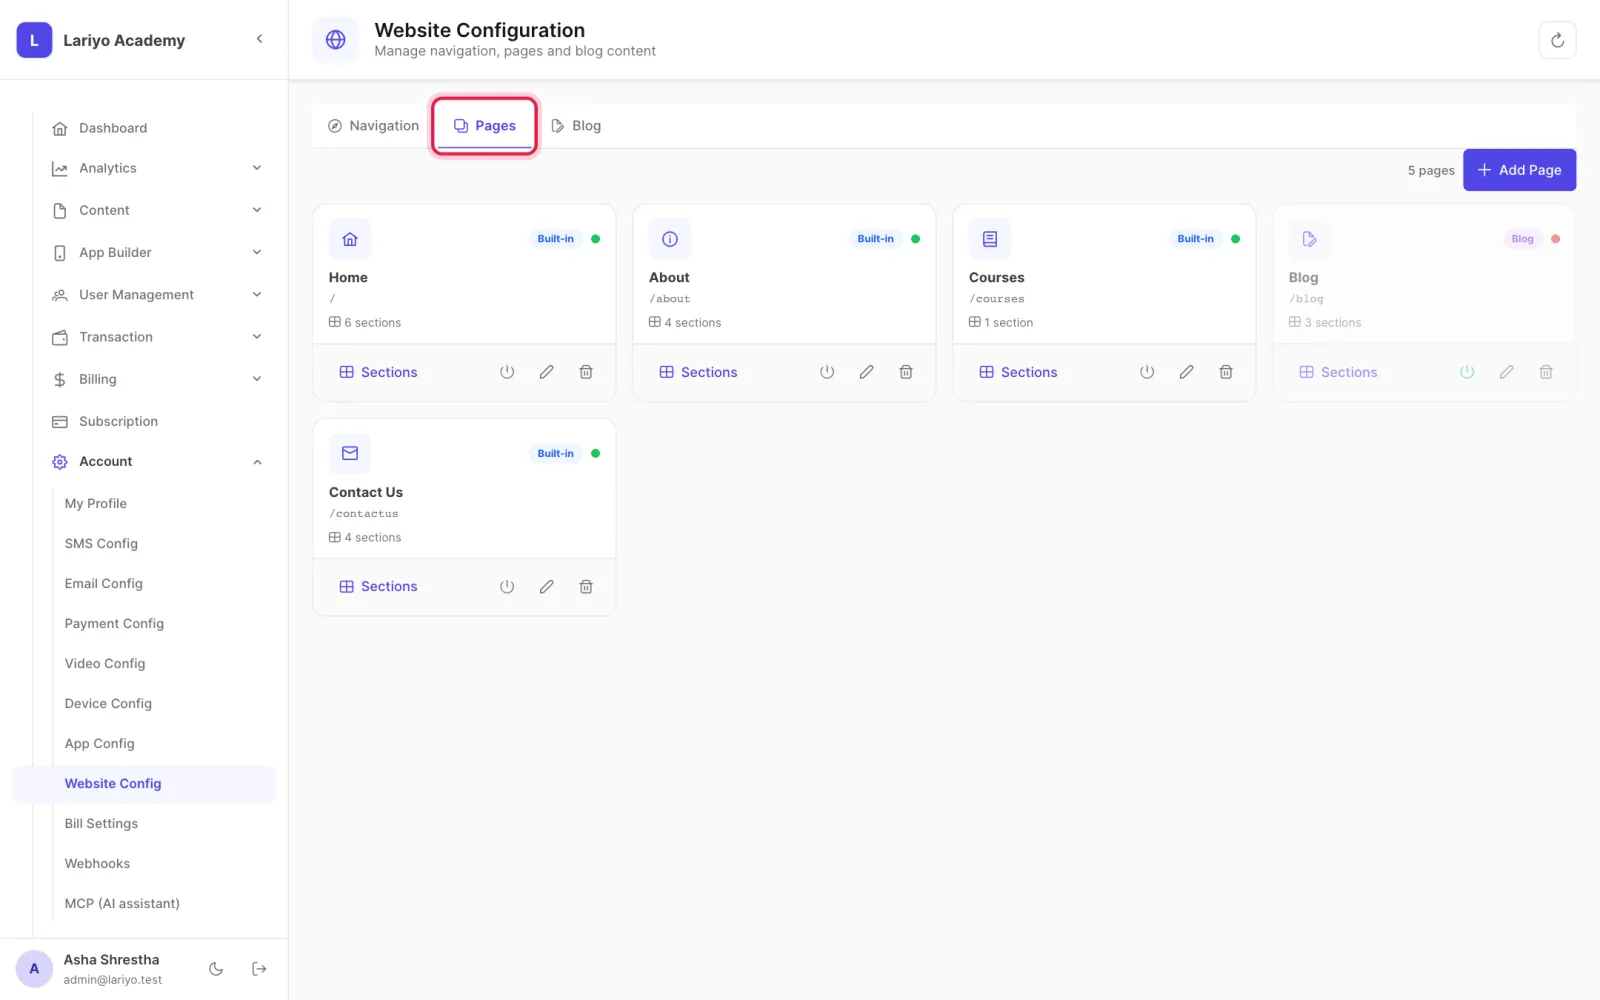
    Step 3 of 4 in the Lariyo admin panel (Account → Website Config): Under Pages, add pages and their sections. The control to use is outlined in red.
  4. Under Blog, write posts with a title, author, image, tags and publish date.
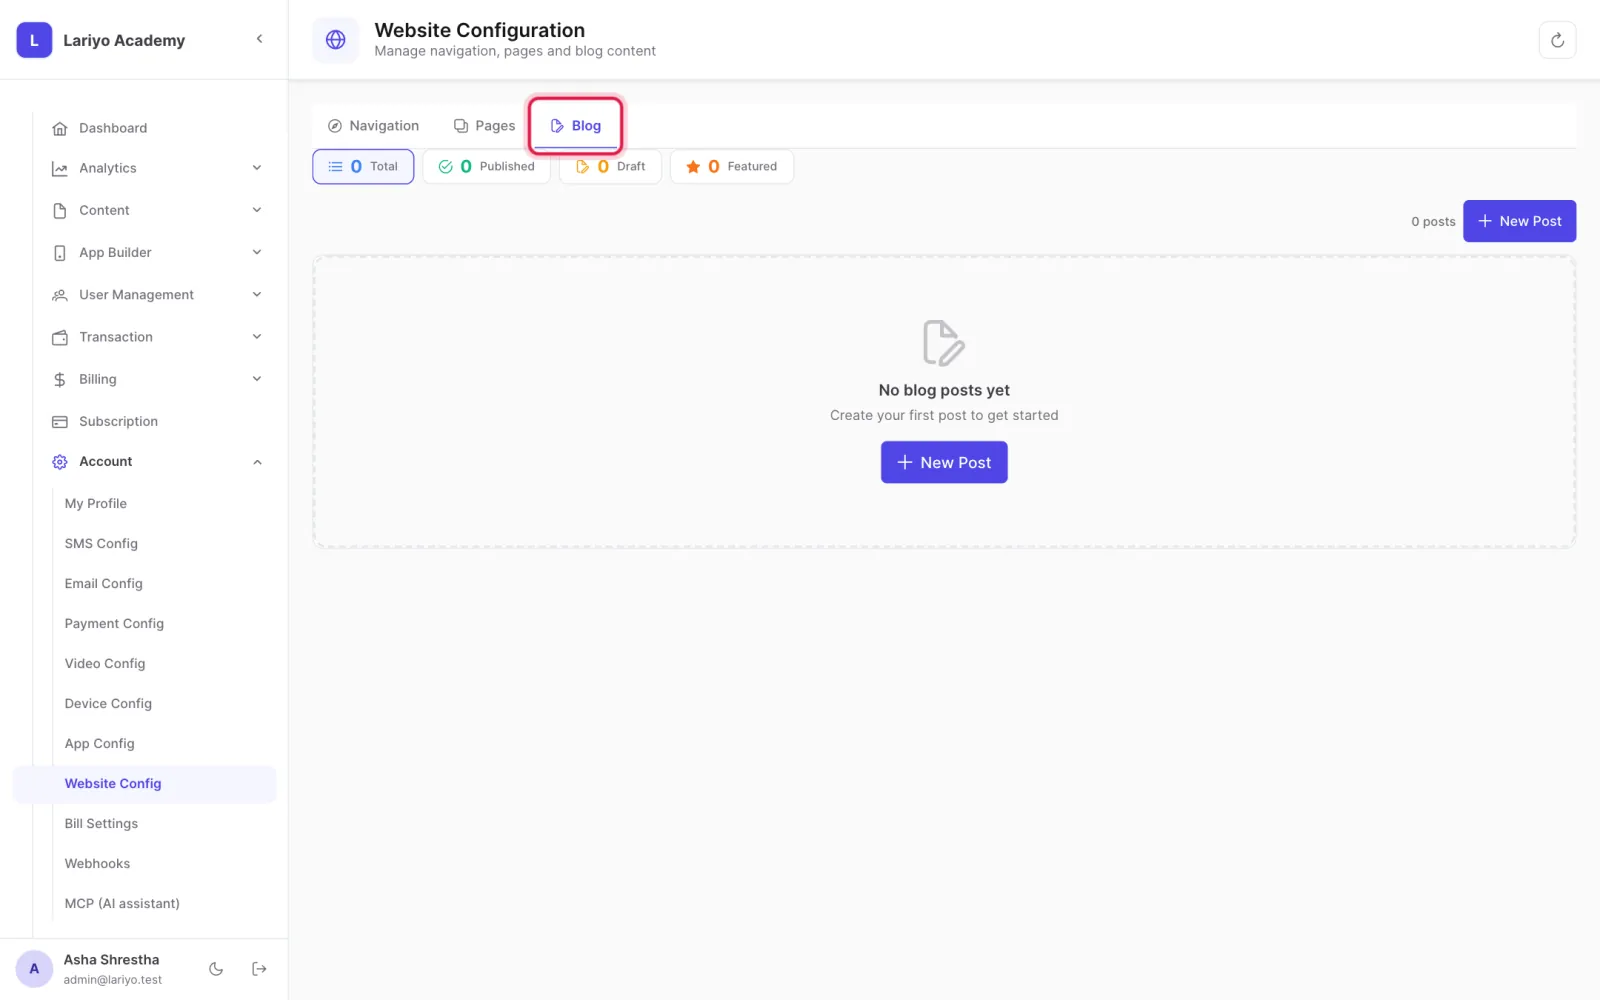
    Step 4 of 4 in the Lariyo admin panel (Account → Website Config): Under Blog, write posts with a title, author, image, tags and publish date. The control to use is outlined in red.

Updated 11 November 2026. Still stuck? Contact us.